Decorative Envelopes for Spring
When you give out handmade cards do you decorate your envelopes? Today Ellen has created two beautiful envelopes to inspire you to give it a try!
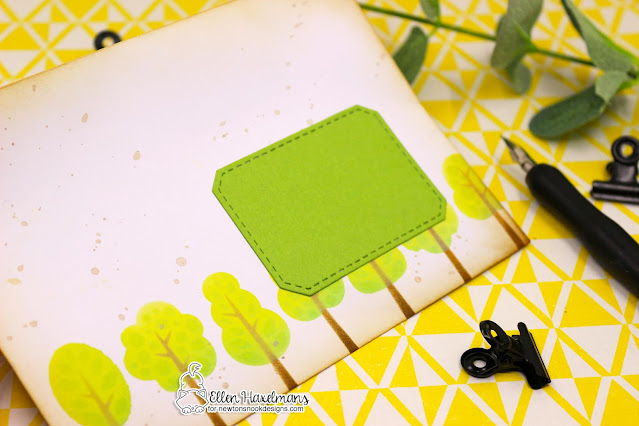
She started by adding a pattern across the envelope front using our Tree Line Stencil. This fun stencil has three rows of patterns that you can line up with the etching on the opposite rows. For her trees she used two shades of green for the tree tops and a brown for the tree trunks. Next, she added some paint splatters across the envelope front and added ink to the corners to give it a fun bit of texture. To finish it off, she cut out a green notched corner rectangle using our Frames & Tags Die Set and glued that to the front. This will be the spot where you can address the envelope.
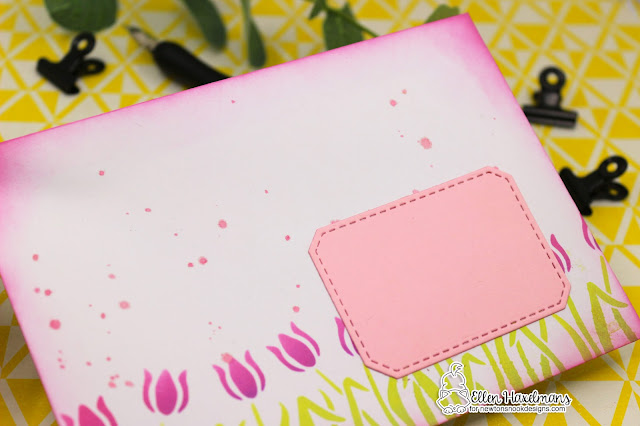
Next, she created a second envelope, using a similar design:this time she added a tulip pattern across the envelope front using our Spring Garden Line Stencil. This fun stencil also has three rows of patterns that you can line up with the etching on the opposite rows. For this stencil you can choose from daffodils or tulips and Ellen chose to add pink tulips. Again, she added some paint splatters (pink this time) across the envelope front and added ink to the corners to give it a fun bit of texture. This time she cut out a pink notched corner rectangle using our Frames & Tags Die Set and glued that to the front.
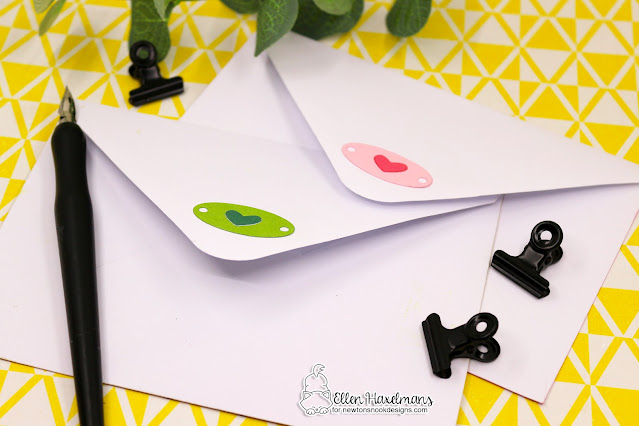
Finally, she added a few decorations to the back flaps too:
To create these fun little additions she cut out the tiny tags using our Frames & Tags Die Set and added little hearts that were cut out using our Speech Bubble Die Set.
What a beautiful way to add some fun to your envelopes! Now what do we think she will put inside them?
To see more creations by Ellen, you can visit her over at her blog Crafty Ellen





.jpg)
.jpg)




%20card%20-%20ls,%20watermark.jpg)


