Friday, February 26, 2021

Farm Themed Baby Card by Ellen Haxelmans

Farm Themed Baby Card by Ellen Haxelmans | Baa, Oink, Cluck, Moo and Loveable Laundry Stamp Sets, Gingham and Cloudy Sky Stencils, and Land Borders and Circle Frames Die Sets by Newton's Nook Designs #newtonsnook

Welcome Little Boy!

Today Ellen has created a wonderful farm themed card to welcome a baby boy! For this card she features several of our farm themed sets together to create an adorable scene! For the farm friends she uses the pig from our Oink Stamp Set, the lamb from our Baa Stamp Set and the chick from our Cluck Stamp Set. She also uses the hay bale and barn from our Moo Stamp Set to set the scene. All the images were cut out with their coordinating die sets (find them all in our farm category). 

She used our Circle Frames Die Set to create the circle and scalloped circle that frames the scene. She also used our Cloudy Sky Stencil and Land Borders Die Set to complete the scene. 

Farm Themed Baby Card by Ellen Haxelmans | Baa, Oink, Cluck, Moo and Loveable Laundry Stamp Sets, Gingham and Cloudy Sky Stencils, and Land Borders and Circle Frames Die Sets by Newton's Nook Designs #newtonsnook

To make this into a baby card she adds the sentiment "welcome little boy" by combining words from our Loveable Laundry Stamp Set. The word "welcome" was added to a banner that was cut out using our Banner Trio Die Set. Our Gingham Stencil on the background with yellow ink really adds to the sweet baby theme!

How to create this card:

Below we have some instructions from Ellen on how to create this card.

Farm Themed Baby Card by Ellen Haxelmans | Baa, Oink, Cluck, Moo and Loveable Laundry Stamp Sets, Gingham and Cloudy Sky Stencils, and Land Borders and Circle Frames Die Sets by Newton's Nook Designs #newtonsnook
  1. (left photo) Using Distress Ink and the Gingham Stencil I made the base of the card..

  2. (center photo) I created a scene in the biggest frame from Circle Frames Die Set. I started with the grass and the hill. This was created with the Land Borders Die Set. I colored these borders with Distress Ink. For the sandy hill I also sprinkled brown, white and water splatters on top. The clouds were created with the Cloudy Sky Stencil and white glitter gel from Therm O Web.

  3. (right photo) The last step was to color the images with Copic Markers and then assemble it all together.
We hope you enjoyed this fun project today and instructions from Ellen! To see more unique creations by Ellen, you can visit her over at her blog Crafty Ellen!


Thursday, February 25, 2021

Olive You Card by Samantha Mann

Olive You Card by Samantha Mann | Newton Celebrates and Love Bites Stamp Sets, Cascading Stars Stencil and Speech Bubbles Die Set by Newton's Nook Designs #newtonsnook

Olive You!

Today Samantha has combined two unexpected sets together to create a celebratory olive themed card! She used the adorable image of Newton in a martini glass from our Newton Celebrates Stamp Set. She colored in image in fun neutral colors, adding a pop of green on the olive and the liquid in the glass!  Then she paired the images of the olives from our Love Bites Stamp Set. She added adorable celebratory hats to the kitty and to the olives using the hat from the Newton Celebrates Stamp Set. The images were cut out using the coordinating Newton Celebrates Die Set and Love Bites Die Set

For the sentiments she cut out two speech bubbles from black cardstock using our Speech Bubbles Die Set and added the "Let's Party" from the Newton Celebrates Stamp Set and the "olive you" from the Love Bites Stamp Set. What a fun combination of sentiments! 

For the starry background on the card base she used our Cascading Stars Stencil, again in lime green to match the theme! 

Here's a close up image so you can see the amazing coloring and the dimension:

Olive You Card by Samantha Mann | Newton Celebrates and Love Bites Stamp Sets, Cascading Stars Stencil and Speech Bubbles Die Set by Newton's Nook Designs #newtonsnook

We hope this card has inspired you to look at your stamp sets and find unexpected ways to mix and match them together! If you find an unexpected pairing, make sure to share your creation with us in our Create & Share Group on facebook or tag us on instagram with #newtonsnook

To say hello to Sam and see more of her amazing creations you can visit Sam over on her blog, Sam's Scrap Candy!

Wednesday, February 24, 2021

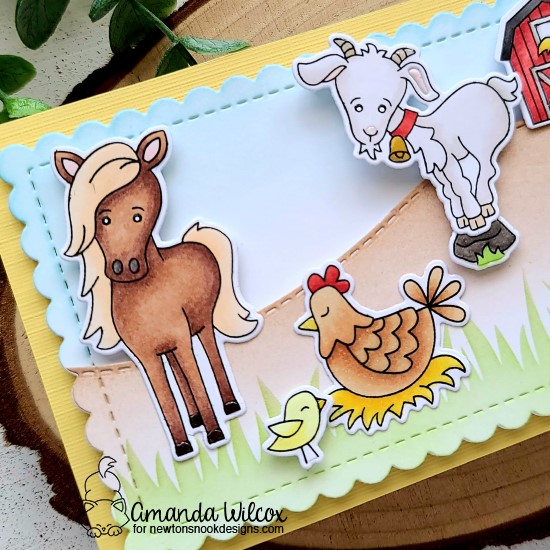
Herd It's Your Birthday Card by Amanda Wilcox

Farm Card by Amanda Wilcox | Neigh, Cluck, Bleat, Baa, Oink and Moo Farm animal Stamp Sets, Hills & Grass Stencil and Land Borders and Slimline dies by Newton's Nook Designs #newtonsnook #handmade

A Herd of Birthday Wishes!

Today Amanda has combined all the fun farm animals in our farm category to create a fun slimline farm themed birthday card! 

To create her herd of animals she combined the horse from our Neigh Stamp Set, the chickens from our Cluck Stamp Set, the goat from our Bleat Stamp Set, the sheep from our Baa Stamp Set, the piggy from our Oink Stamp Set and the cow and barn from our Moo Stamp Set! How fun! She colored all the fun friends and cut them out using their coordinating die sets (find them all in the farm category). 

To set the scene, she cut a big long scalloped panel using our Slimline Frames & Portholes Die Set . Then she added grass with our Hills & Grass Stencil and a hill with our Land Borders Die Set.  The sentiment "herd it's your birthday" is from the Moo Stamp Set

Here are a couple of close ups so you can see all the amazing coloring details:
Farm Card by Amanda Wilcox | Neigh, Cluck, Bleat, Baa, Oink and Moo Farm animal Stamp Sets, Hills & Grass Stencil and Land Borders and Slimline dies by Newton's Nook Designs #newtonsnook #handmade

Farm Card by Amanda Wilcox | Neigh, Cluck, Bleat, Baa, Oink and Moo Farm animal Stamp Sets, Hills & Grass Stencil and Land Borders and Slimline dies by Newton's Nook Designs #newtonsnook #handmade

We hope this card inspires you to use some of our fun farm friends together on your next card!  

To say hello to her and see more of her awesome creations you can visit Amanda over on her blog, Twiddler's Nook!


Tuesday, February 23, 2021

Colorful Easter Bunnies Card by Maria Russell

Colorful Easter Bunnies Card by Maria Russell | Hop Into Spring Stamp Set, Bunny Tails Stencil Set, Clouds Stencil, Circle Frames Die Set and Land Borders Die Set by Newton's Nook Designs #newtonsnook #handmade

Colorful Easter Bunnies!

Today we have a bright and cheerful Easter card by Maria to share! She created rows of adorable bunnies in bright colors using our Bunny Tails Stencil Set. This stencil set has two layers and she used the second "tail" layer to add fluffy white tails to all the bunnies using white texture paste! So cute! 

For her card, she cut a large circle out of the colorful bunny pattern using our Circle Frames Die Set to hold a cute little bunny scene that features the bunny holding a daffodil from our Hop Into Spring Stamp Set. She colored the cute bunny using alcohol markers and then cut it out with the coordinating Hop Into Spring Die Set. She also filled the circle with a scene, creating clouds with our Clouds Stencil and adding die cut grass using our Land Borders Die Set. The sentiment, "happy Easter" from our Newton's Easter Basket was embossed in white on black paper and she hand cut it out. 

Here is a close up so you can see the incredible coloring on the bunny and daffodil and those fluffy tails!

Colorful Easter Bunnies Card by Maria Russell | Hop Into Spring Stamp Set, Bunny Tails Stencil Set, Clouds Stencil, Circle Frames Die Set and Land Borders Die Set by Newton's Nook Designs #newtonsnook #handmade

This card would be perfect for sending fun and cheerful wishes this Easter!  

To see more beautiful projects by Maria you can visit her over at her blog, Maria Russell Designs and don't forget to subscribe to her YouTube channel too!


Monday, February 22, 2021

Find Your Sunshine & Bloom Card by February Guest Designer Caitlin Anthony


I cannot believe that we are in the last week of February already! I am so excited to share my last project with you, it is bright and fun and a little different for me. I really wanted to try out a technique that I have seen other people do a lot but have never tried myself, emboss resist inking! I hope you love this cheerful, anytime card as much as I do and if there is something you have been wanting to try out, now is the time!!

Daisy Card by February Guest Designer Caitlin Anthony | Dainty Daises and Floral Fringe Stamp Sets by Newton's Nook Designs #newtonsnook #handmade

I started out by applying anti static powder to a piece of plain white cardstock and brushing it all over to make sure that the whole thing had a light coating so my embossing powder would only stick to the ink in later steps. Then I stamped the main square image from the Floral Fringe Stamp Set with clear embossing ink and applied a white detail embossing powder. I used a heat tool to melt the embossing powder slowly across the whole piece (isn’t that the most satisfying thing?).

Emboss resiste inking by February Guest Designer Caitlin Anthony | Floral Fringe Stamp Sets by Newton's Nook Designs #newtonsnook #handmade

The next step was to use Scattered Straw and Dried Marigold Distress Inks to blend over the embossed image creating an ombré effect with the lightest spot in the middle. I used a baby wipe to lightly wipe over the piece after the ink blending was complete to make sure all of the excess ink was off of the embossed image. I really want to make these in every color combination I can think of now because it was so easy and I love how it turned out.

Emboss resiste inking by February Guest Designer Caitlin Anthony | Floral Fringe Stamp Sets by Newton's Nook Designs #newtonsnook #handmade

I added one of the sentiments from the Floral Fringe Stamp Set to the middle of the floral frame with black ink to make sure it really popped against the light colors. Then I grabbed the Dainty Daisy Stamp Set, which I just got and have been dying to use!! I stamped the daisies in an alcohol friendly ink and colored them in with copic markers. After I die cut the flowers with the coordinating die set, I added some white dot detailing with a white gel pen to give the whole thing a little more texture. After seeing the colors of the two floral pieces I decided that a grey cardstock would help to ground the card without being too stark and that adding in a pattern with grey and white together would help to balance it out as well. I trimmed the Floral Fringe frame just around the white outer border and used liquid glue to adhere all my layers together and then attached that whole thing to a standard A2 sized card base (4.25 x 5.5 inches). This card ended up being a very different look for me, I am not very comfortable combining patterns and this really made me glad that I tried it out.

I am so grateful to Newton’s Nook and all of you for your support this month! This stamp community has really been a life saver for me the last couple years and I really hope that I inspired you to try out something new or maybe use something you already have in a new way. Remember that this whole thing is supposed to be fun, so don’t stress if something didn’t turn out 100% the way that you thought, just create and go with your gut!!!
 
Thank you all again!

Friday, February 19, 2021

February Products Now Available + Blog Hop Winners!

Are you ready to get your paws inky with our new products?

Winners from the blog hop are posted below - scroll down to see if you won!

Our new products are now available at newtonsnookdesigns.com


February Blog Hop Winners!

Thank you to everyone for participating in our blog hop. We really enjoy reading all of your comments! Check out below to see if you won! The blogs and the comments were chosen using random.org.

From Reveal Day 1 - Winner of the Spring Roundabout Stamp Set from Tina's blog: Laura S


From Reveal Day 2 - Winner of the Hoppy Greetings Stamp Set from Farhana's blog: Cheryl Taylor


From Reveal Day 3 - Winner of the Baa Stamp Set from Tatiana's blog: Krissy KF


From Reveal Day 4 - Winner of the Newton's Rainy Day Trio Stamp Set from Ellen's blog: Andrea W


From Reveal Day 4 - Winner of the Daffodils Stamp Set from the Newton's Nook Designs blog: Lin


Congrats to the Winners! Don't forget - you have 7 days from today to to e-mail us at info@newtonsnookdesigns.com with your full name, mailing address and the name of the set you won to claim your prize.


Thursday, February 18, 2021

February Reveals Day 4 - Newton's Rainy Day Trio + Daffodils

February 2021 | Spring Release by Newton's Nook Designs
Today is the final day of our reveals for February and we have two more incredible designs to share! Today we are celebrating a rainy day with Newton and his friends donned in their rain-gear! Next, in our second set, daffodils are sure to brighten your days this spring!  down for details. Plus, we are having a giveaway today, so make sure you read all the way to the bottom of this post to see how to win!
Meow-ing in the Rain Card by Jennifer Jackson | Newton's Rainy Day Trio Stamp Set, Raindrops Stencil and Sky Borders Die Set by Newton's Nook Designs #newtonsnook #handmade

Newton's Rainy Day Trio

Meow-ing in the rain! This delightful 4x4 stamp set features an Newton and his kitty friends, sheltering together from the rain. This sweet trio of friends look so cute dressed in their rain coats and boots! This image is the perfect way to celebrate a rainy day! Die sets sold separately.
Newton's Rainy Day Trio Stamp Set and coordinating die set by Newton's Nook Designs

Newton's Rainy Day Trio Stamp Set
Daffodil Card by Jennifer Jackson | Daffodils Stamp Set, Petite Flowers Stencil and Frames & Flags Die Set by Newton's Nook Designs #newtonsnook #handmade

Daffodils

This lovely 3x4 stamp set features a beautiful bunch of daffodils. Perfect for spring themed projects, this cheerful floral set also includes sentiments that are great for sending get well wishes and for brightening someone's day! Don't forget to add the little butterfly too! Die sets sold separately.

Daffodils Stamp Set and coordinating die set by Newton's Nook Designs

Daffodils Stamp Set
  • 3 x 4 photopolymer stamp set
  • Includes 5 stamps: 2 images and 3 sentiments
  • Coordinating Daffodils purr-fect die set (sold separately) includes 2 dies
  • Available for purchase in our online shop starting Friday, February 19th

Brighten up any rainy day with cheerful inspiration from our Design Team!

Check out all the awesome projects below from our Design Team below! Then, make sure to click through to all their blogs for details on their cards - you will find a few extra cards on some of the DT blogs and you might even find a fun video or two along the way! Make sure to comment on all the blogs for a chance to win! Details on the giveaway are at the bottom of today's post.

Daffodil Card by Maria Russell | Daffodils Stamp Set by Newton's Nook Designs #newtonsnook #handmade
Created by Maria using the Daffodils Stamp Set


Meow-ing in the Rain Card by Samantha Mann | Newton's Rainy Day Trio Stamp Set and Banner Trio Die Set by Newton's Nook Designs #newtonsnook #handmade
Created by Samantha using the Newton's Rainy Day Trio Stamp Set. Additional products used: Banner Trio Die Set

Daffodil Card by Maria Russell | Daffodils Stamp Set, Bitty Bunnies Stamp Set, Basketweave Stencil, Circle Frames Die Set and Banner Trio Die Set by Newton's Nook Designs #newtonsnook #handmade

Friends in Any Weather Card by Larissa Heskett | Newton's Rainy Day Trio Stamp Set, Raindrops Stencil and Frames & Flags Die Set by Newton's Nook Designs #newtonsnook #handmade
Created by Larissa using the Newton's Rainy Day Trio Stamp Set. Additional products used: Frames & Flags Die SetRaindrops Stencil


Daffodil Thank You Card by Tatiana Trafimovich | Daffodils Stamp Set, Basketweave Stencil and Circle Frames Die Set by Newton's Nook Designs #newtonsnook #handmade
Created by Tatiana using the Daffodils Stamp Set and Basketweave Stencil. Additional products used: Circle Frames Die Set


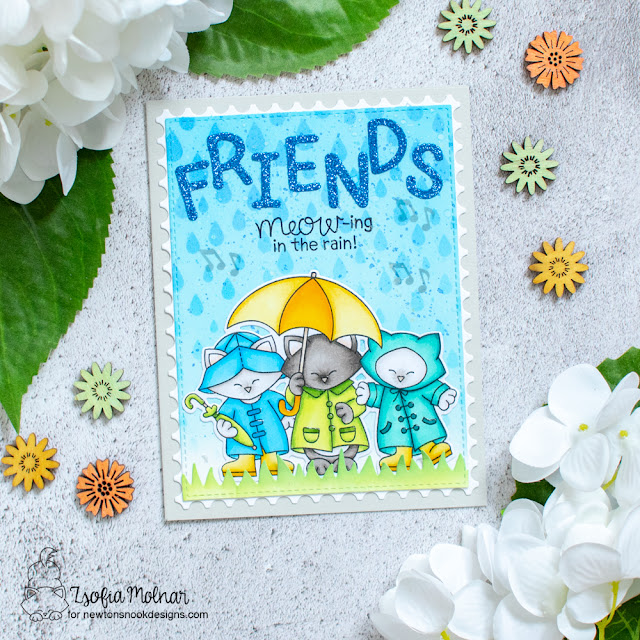
Meow-ing in the Rain Card by Zsofia Molnar | Newton's Rainy Day Trio Stamp Set, Raindrops Stencil, Essential Alphabet Die Set and Framework Die Set by Newton's Nook Designs #newtonsnook #handmade


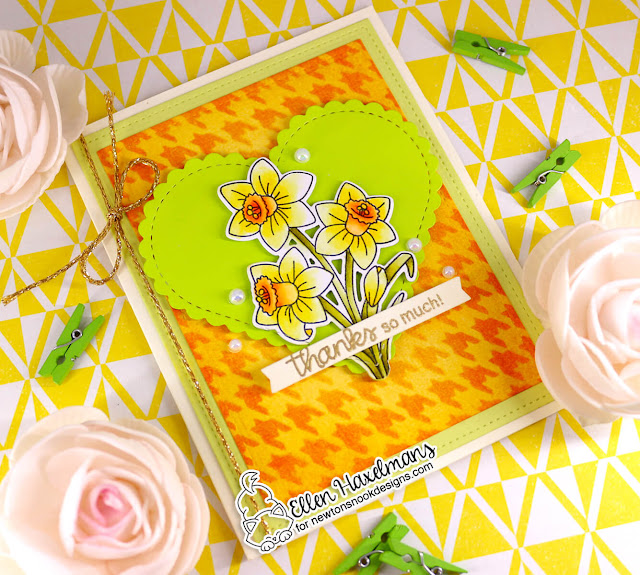
Daffodil thank you card  by Ellen Haxelmans | Daffodils Stamp Set, Heart Frames Die Set and Houndstooth Stencil by Newton's Nook Designs #newtonsnook #handmade
Created by Ellen using the Daffodils Stamp Set.  Additional products used: Houndstooth StencilHeart Frames Die Set

Friends in Any Weather Card by Samantha VanArnhem | Newton's Rainy Day Trio Stamp Set and Clouds Stencil by Newton's Nook Designs #newtonsnook #handmade
Created by Samantha using the Newton's Rainy Day Trio Stamp Set. Additional products used: Clouds Stencil

Daffodil Card by Farhana Sarker | Daffodils Stamp Set and Petite Flowers Stencil by Newton's Nook Designs #newtonsnook #handmade
Created by Farhana using the Daffodils Stamp Set. Additional products used: Slimline Frames & Portholes Die SetPetite Flowers Stencil

Would you like to win the “Newton's Rainy Day" or the "Daffodils" Stamp Set?
We will choose ONE lucky winner for each stamp set!

Here's how to win: Comment on the NND blog and Design Team blogs (see list below)! The winner will be chosen at random from the collective reveal posts. Make sure to check out each of their blogs and comment for your chance to win. You will not know which blog has been chosen so the more you comment on the better your chances are of winning! You have until Thursday February 18th at 9pm EST to comment  -- winners will be announced on the blog post on Friday, February 19th.  

Check out all the awesome Design Team Blogs below to enter: