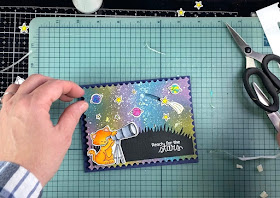
Hello Krafty Friends! I’m back as April’s Guest Designer for Newton’s Nook Designs. In this weeks card, Newton is looking through his telescope and sees a shooting star. I used the Cosmic Newton Stamp Set to make a cute slider card, I have many more ideas with this set in mind!

Working out the logistics of this slider card, was both exciting and a little frustrating. But…this months theme has been thinking outside of my box, I can’t get “outside” of my house, so I guess I should step outside of my box!

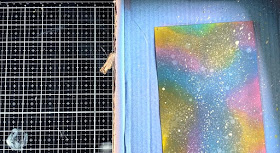
I started my project making my background. I wanted a pretty galaxy sky, I used Distress Oxide Inks to achieve my goal. I did make two large backgrounds so I could get four card panels out of them. On the first one I used Mustard Seed, Picked Raspberry, Squeezed Lemonade, Seedless Preserves, Twisted Citron, Salty Ocean, Mermaid Lagoon, Chipped Sapphire and Black Soot. I first laid down the bright inks, overlapping some to blend in secondary colors. Then I muted them down with Chipped Sapphire and Black Soot to create a nighttime effect. On my second panel I left off a few colors (Squeezed Lemonade, Seedless Preserves, Twisted Citron and Salty Ocean).

Once the layering of ink was complete I first sprayed the panels with water, to get the oxide reaction. Then I splattered some watered down white and yellow acrylic paints with a little liquid stardust.

On my second panel I also splatter liquid stardust directly, I loved the effect this gave…its sooo shimmery!

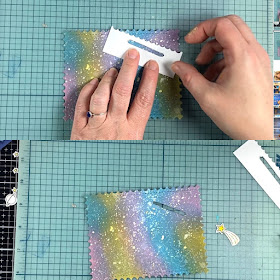
I then decided to cut my background from the largest die in Newton’s Framework set. Next was my challenge. I wanted to create a shooting star, and all the slider card dies I have in my stash were too wide, so I had to be creative and come up with my own template. My first attempt (the second is shown here) didn’t work exactly like I had wanted, so I tried again. This time I did use a slider die, but modified it and made it smaller on a white piece of cardstock. I also decided that a curve wasn’t going to work properly, because I couldn’t get it to slide smoothly. I made my template, then traced it onto my background panel, and used my pen blade to cut it out. Then I used foam tape, and a dime to make my shooting star slide. The dime for the weight, and the foam tape for dimension. I used a triple layer of foam tape all around the edges of the card and some in the middle for stability. This gave the space needed for the star to slide.

I stamped my images onto a copic friendly cardstock using Lawn Fawn’s Jet Black Ink. Then used the following Copic Markers for my palette:
- Newton’s Fur: Y35, Y38, YR15 and YR16. Ears: R20. Collar: B04, B06, B00.
- Telescope: C2, C3, C4, , C5, `C6, and C8.
- Planets: RV04, RV06, RV09, V12, V15, Y06, B04, and B06.
- Stars: Y06, Y08 and Y19.
- Stardust: Y000, YR00, BG000, R00 and C00.

I cut grass from black cardstock and used Versamark Ink to stamp my sentiment “Reach for the Stars.” Then I heat embossed with Hero Arts white embossing powder. Next, I adhered all the elements to my card.
As I said above this was my second card, the card on the bottom of this picture was my first. I didn’t care for the sentiment in the sky, I thought it popped much better on the black grass. Plus, I wasn’t pleased with the way the slider was actually sliding. So, I went back to the drawing board and fixed the areas I wasn’t happy with. I’m so glad that I did, I really love my finished card now!

I've also created a video showing you how I created this card:
Thanks so much to Newton’s Nook Designs for having me as their April’s Guest Designer (can you believe April is almost over)?! It was such a huge honor for me to be asked, I truly love their products! They have such a wonderful group of ladies to work with, I’ve enjoyed my time immensely!


Amazing card!
ReplyDelete