Hi friends! Welcome to the NND
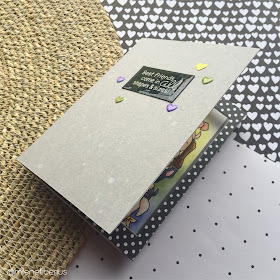
blog and to my last blog post as a guest designer. I have a fun shadow box card
to share with you today. I created this card after watching Jennifer McGuire’svideo (Thank you, Jennifer!). This is such a cool technique and very versatile,
too. It allows you to create a card that folds flat, but turns dimensional when
popped open.
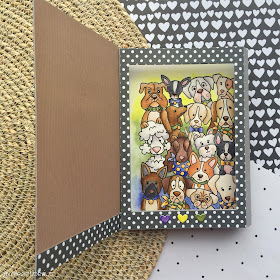
Here is a photo to give you an
idea of what this design looks like:
I started out by heat
embossing the large dog image from the Woof Pack Stamp Set. I stamped it on a
piece of Bristol Smooth cardstock and used my Tombow markers to watercolor the
puppies and background. I had so much coloring these dogs! The Chihuahua on the
top row was colored to look like my own. When the watercoloring was good and
dry, I added glossy accents to the noses of the dogs and to some of their
accessories. You could also add whiskers to them all. I think that would be so
fun! Just be sure to add all the details before assembling the card together. I
then set this piece aside to dry and started working on the card base.
I used the following Tombow
markers: N15, 020, 133, 177, 565, 772, 800, 879, 912, 942, 969, 977, 990, 992
and 993.
The card base was created
using a heavy weight gray cardstock. I also chose some pattern paper to help me
decorate the inside of my card – from the Lawn Fawn Knock On Wood and Let’s
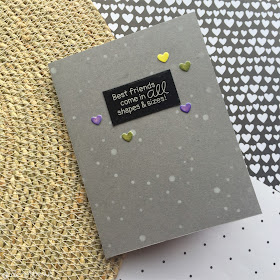
Polka In The Meadow paper packs. I wanted the card front to be simple, so all I
did was add some white ink blending to the card base. I carefully inked only
the circles from the Starfield Stencil. I thought that the stars would be too
much for this design. I die cut a rectangle window on the inside panel, so that
you would be able to see the dogs. That will create the shadow box affect.
There is some very precise
measuring and scoring to create this design. If you would like to see the full instructions,
I suggest you watch Jennifer McGuire’s video. I think the process gets much
easier once you see it come together. However, you will need very basic
supplies to be successful.
Remember that you can use this idea with just about
every type of card!
Moving on, I white heat
embossed the sentiment for my card front and added a few die cut hearts. I
coated it all using glossy accents, for dimension and shine. I wanted my
personal message to be “hidden”, so I added a piece of white cardstock to the
back of the card. That is where I will write my message and sign.
That is it for me today! I
hope you enjoyed my card for this week and that you will try this technique.
Can you imagine all the possibilities?! Head on over to the Newton’s NookDesigns shop to stock up on cute images and get creating!
The month of July has been
such a joy for me. I am very grateful for the opportunity to share my work with
you. Thank you Newton’s Nook team for having me here throughout July! I am
excited to see what’s to come from all of you.
Hope you have a great day!


It's so nice card!
ReplyDeletehugs