Today we have another fun interactive project to share by Ellen! Each month she is sharing an interactive project one week after our new release!
Today is she's sharing how to make a card with scenes that appear in layers and build suspense as you open the card:

Here are step-by-step instructions on how to make the folding layers for this card:
- For this card you start using a square card base. One side you cut off half of it. (photo top left)
- The next step is to make three flaps with the same measurements as the half sized flap and with a bit extra so you can glue the flap on your card. After cutting the paper I folded the sides with my bone folder. (photo top right)
- Glue down the three extra flaps on the rest of the sides. (photos bottom left)
- Let the fun begin and decorate your flaps. On her card today Ellen created created three scenes, but you could also decorate each flap with something different.
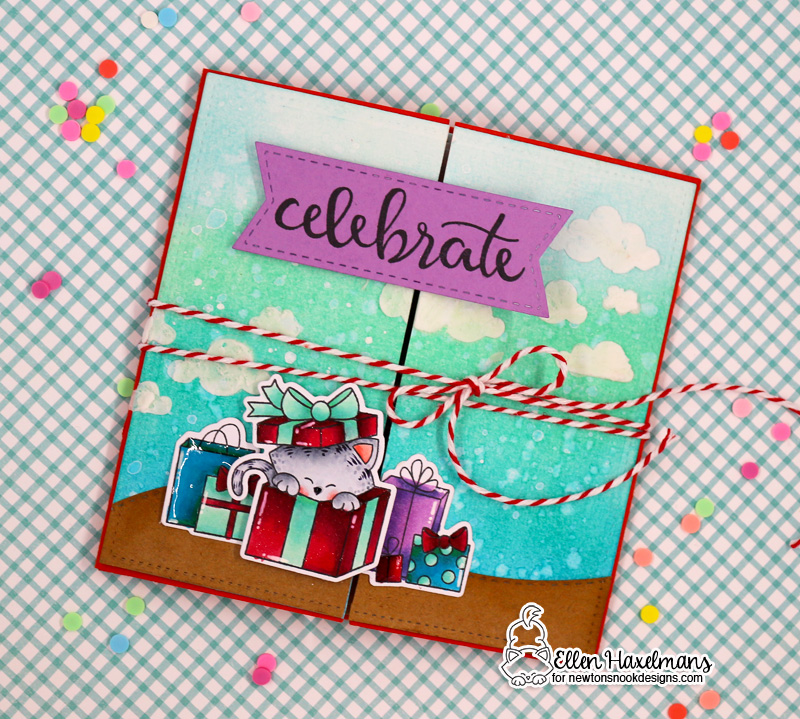
When the card is closed with all flaps folded in, she has a fun birthday scene on the front.

To create this scene she used the images of gifts and the cute kitty popping out from the gift from the Newton's Christmas Cuddles Stamp Set. She colored the piles of gifts in fun bright colors and also added in some fun clouds to the sky using the Cloudy Sky Stencil and added on the "celebrate" from the new Birthday Essentials Stamp Set. The little stitched purple flag was cut out using our Frames & Flags Die Set.
Next, you open those two flaps to reveal this next scene:
So cute! For this scene Ellen used the kitty with the cake from the from the Newton Loves Cake Stamp Set and add a cute little coke bottle for him from the Love Bites Stamp Set. She created a hill using the Land Borders Die Set and also added in a cute little chick from the Newton's Easter Basket Stamp Set. In the sky behind the kitty she added pawprints using our Pawprint Stencil. She also added the "make a wish" sentiment from the new Birthday Essentials Stamp Set.
Then you can fold open those two flaps to reveal the final message and inside of the card:
Wow! What fun! On this last scene Ellen used the kitty with balloons from the Newton's Birthday Balloons Stamp Set. She added some clouds along the bottom using our Sky Borders Die Set and added confetti to the sky with the Confetti Stencil! She also added in the "Happy Birthday" from the new Birthday Essentials Stamp Set. She even added in a cute little birthday hat from the Newton Loves Cake Stamp Set.
This is so fun, don't you think!? It makes opening the card such a fun journey with a scene at each step! Are you inspired to try to make a fun card like this for someone special? Make sure you share it with us if you do! We'd love to see it!
If you love this project by Ellen you can visit her over at her blog Crafty Ellen to see more of her beautiful creations!


WOW WOW WOW!!!! And MEOW!! :D LOVE so much this interactive card!! Such brilliant idea! Thanks so much for sharing the tutorial!!
ReplyDeleteThank you!! If you ever make a card like this please show us!
DeleteWhat a fun card!
ReplyDeleteThanks a lot for your comment 🙂
DeleteLove this so much!!!
ReplyDeleteYou should try making it!!
Deleteamazing card!
ReplyDeletelove it!
Thanks sweety!!
DeleteTotally love this card!
ReplyDeleteIt was really fun to make too!!
Delete