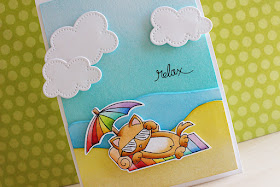
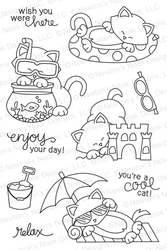
Hello everyone, Eloise here again and today is my third post for Newtons Nook. Today I'm using the Newton's Summer Vacation to create a simple beach scened card.
 To start off my card today, I first stamped and coloured Newton laying on the beach with some Memento Tuxedo Black Ink and using my Copic Markers. I then trimmed him out with my scissors and put him to one side. I then pulled two pieces of watercolour cardstock, and cut one piece towards the bottom with my scissors, creating a wavy border, and then that piece in half again using my scissors, to create another wavy border.
Once my borders and background were ready, I then pulled some Distress Inks out, Tumbled Glass, Salty Ocean and Mustard Seed and coloured each of the pieces using an ink blender. I used Tumbled Glass for the main sky piece. Then used Mustard Seed for the bottom wavy cut piece for sand, and then the left over piece for the water above the sand. Once everything was coloured, I dried the pieces quickly with a heat tool.
Now that my pieces were ready to go I could assemble my card. I first pulled a white card base and adhered down my background sky piece flat to the base. I layered up my other pieces - the water and sand and lined them up. Then before adhering them down I used the 'relax' sentiment from the same Newton's Summer Vacation stamp set and stamped that directly onto the background using some black ink. I then used foam adhesive and adhered the water and sand pieces down onto the bottom of my sky piece. Once my background was adhered I went ahead and also adhered my image down using foam tape also.
For a last finishing touch, I die cut some clouds out of white cardstock and also adhered those down to the background with some foam tape. I felt like the background needed a little something extra.
I hope you enjoyed my card today, I love this set it's so super cute and easy to make quick and easy scenes with it. I'll be back next week with my last card for the March Guest Designer. Thanks so much for stopping by!
- Eloise
--------------------------------------------------------------------------
Supplies Used:


Its wonderful !
ReplyDeletewowie! so cute :) love the coloring
ReplyDeletelove this card!
ReplyDeleteGorgeous <3
ReplyDelete