Happy Monday! Today I'm sharing a card using Prehistoric Pals and overlapping them - using a masking technique. If you've been following along on the blog you've probably seen the Design Team has done masking on many of their card samples. I wanted to share with you the way I do masking in case you haven't tried it yet yourself.
First you need some sticky notes. I found these cool ones that are full adhesive- that means the sticky is all the way across the back of the note, not just along the top!
Step one - stamp image onto sticky note and cut it out. This is the hardest part. Carefully cut around the image, close to the stamped edge.
Step two - stamp the same image onto your card stock. This will be the piece you use for your card.
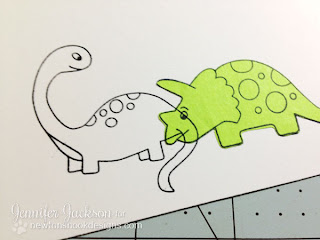
Step three - Place the Dino sticky note over the Dino stamped on the cardstock. Now your Dino is masked and you can stamp another one right over the top. See how his tail goes right over the face? that's ok because now you can just peel off the sticky note.
Here's what it looks like after you pull off the sticky note Dino. Cool, huh?
That's all there is too it... it's a little tedious to cut out the first shape but I save my mask right with my stamps - stick it on the back of your acetate sheet. You can definitely use it more than once-- and you should after you spent all that time cutting it out!
Here's a close-up of the final card - I finished it up by coloring the Dinos with Copics and adding the "RAWR" stamped on a wooden thought bubble! I also used an embossing folder in my Big Shot to create the pebbles background.
If you like this Dino set, you can now find it for sale in our shop at www.newtonsnookdesigns.com It's called Prehistoric Pals!


Never heard of 'full adhesive' post its before - I am so checking our Target for these! I LOVE masking! Thanks for the tip!
ReplyDeleteThanks for posting...I've been wondering how to do this!!! :)
ReplyDeleteGreat masking post...love how you used the full adhesive sticky note.
ReplyDelete